Hello Friends!
I've been putting off this post, well posts in general, but I'm back! I've spent the last 6+ months fostering kittens so I've been very preoccupied and exhausted. I currently have 3 kittens sleeping somewhere around here. They are so cute but so much work. Hoping to get them placed soon and get back to normal, if there is such a thing.
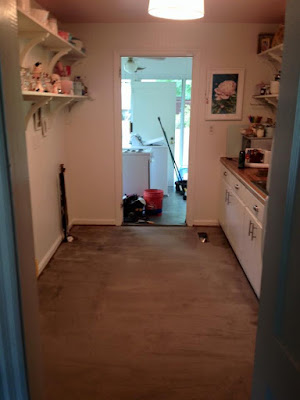
But! I'm here and ready to start sharing again! Tonight I'm sharing the journey of revamping my kitchen. This is what my kitchen looked like the day I saw it for the first time. I was a little overwhelmed by the work I saw but more so incredibly optimistic and excited about bringing it back to life. My house was built in the 1950's so 60 years of life have passed through this house, especially the kitchen. I'm only the second person to ever live here and that was a huge burden on me to make sure to respect this house and the period. Plus I wanted it to be a fun room! I spend so much time in the kitchen and even though it's the smallest room in my house whenever people come over we always end up all in this room at some point chatting and eating. I love my kitchen.
The before pics commence. The kitchen was just drab and sad feeling but so much potential.
It took me about 4 months to even begin thinking about working on the kitchen. I had an idea of what I wanted but it took me forever to find just the right project materials. Before I did anything though I repainted the cabinets and replaced the hardware. That was fun (NOT). Some of those pulls were rusted so badly I had to saw them off. 60 years of kitchen grime and water running down from the sink. I found my pulls at Home Depot, Liberty Cup Pull & Liberty Steel Bar Pull. All cabinets and walls are Benjamin Moore White Dove.

Ain't she pretty! BTW That Magic Chef was vintage, vintage, vintage. Solid metal and had a gas leak. So I didn't use an oven for 6 months.
I found this paintable faux beadboard wallpaper at Lowes and painted it to match the cabinets. Also as you can see the ceiling is pink. I love the pink ceiling. I actually saw the paint color in the deck months before and thought the name was my favorite, Cats Meow. And then my mom saw it and said, "Well that is precious! You should paint the ceiling this color!" And so I did!
6 months after I bought my house, an oven!
Before and after at the time. Already a transformation! And it stayed that way for another 6 months.
Then I finally found my inspiration fabric. This fabulous Romo Villa Nova pattern. It's part of their High Society collection, it's called Tea at the Ritz.
My heart exploded.
I designed this cornice and once it went up everything else fell into place.
I picked out this Congoleum confetti vinyl tile. Congoleum has been around for 130 years. It definitely had its most memorable time in the 50s and 60s. Check out these examples!
1931 Congoleum Vinyl "Rug"
1945 Vinyl "Rug"
1960s Congoleum Vinyl. Woah!
Well my choice was a perfect match. It took me another year to get around to actually finding someone who could order and install it for me. But now it looks great!
There's the original 50s asbestos vinyl floor. It probably looked great with that big brown oven.
All covered up.
Brand new! Yay!
Oh I should take a minute to talk about the shelving. I knew I wanted open shelving. The kitchen is so tiny I wanted it to feel open and airy. I found these brackets at House of Antique Hardware. They weren't cheap but it's what I wanted. It was actually really difficult finding the perfect ones. They are very custom, thus the price, but it was worth the time and money in my book.
And we're back! Here's what it looks like now. Quite the transformation. I've still got things to do but it's been a fun project.
This is on my ultimate dream list here: A pink Big Chill fridge
$$$$.$$
It's definitely on the "Someday" list but won't it be perfect!?!
Well I hope you've enjoyed this post and are inspired to get creative and take a leap of faith on your next project.
See you soon!
xo, Chelsea


